Electronic Design and Family Site
LED Lighting for my Radio Operating Position
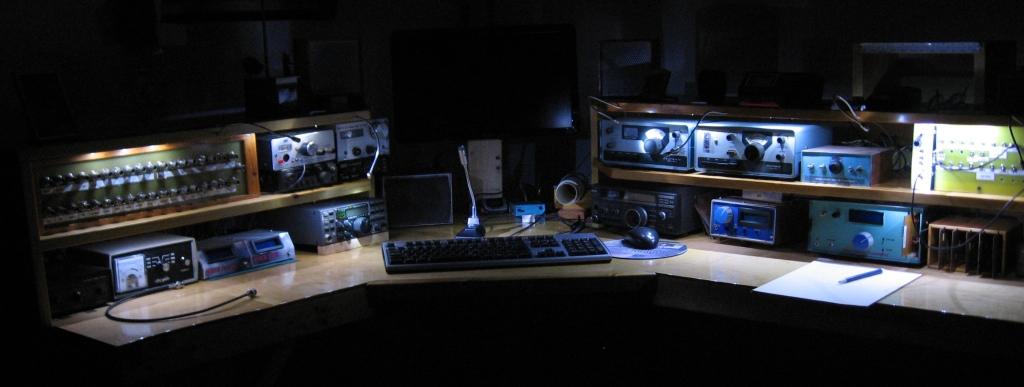
Years ago on QRP-L, a member gave me a couple dozen high-intensity white SMT LEDs. I played with them several times over the years but couldn't work out a good way to mount them while hiding the wires. In the intervening time, I also found some tiny gooseneck LED lights at a hamfest for the paltry sum of $1 each. When I decided to rebuild my operating position, it offered me the opportunity to finally incorporate those lights into my radio bench.
I wanted the SMT lights to shone downward onto the equipment, but the shelves were made of solid wood. How would I mount the LEDS so that they only shined downward an not outward...effectively blinding me. The only way I could come up with was to hollow out an area on the underside of each shelf and mount the LEDs in that area.
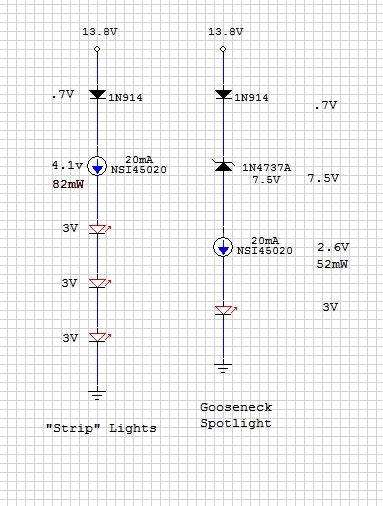
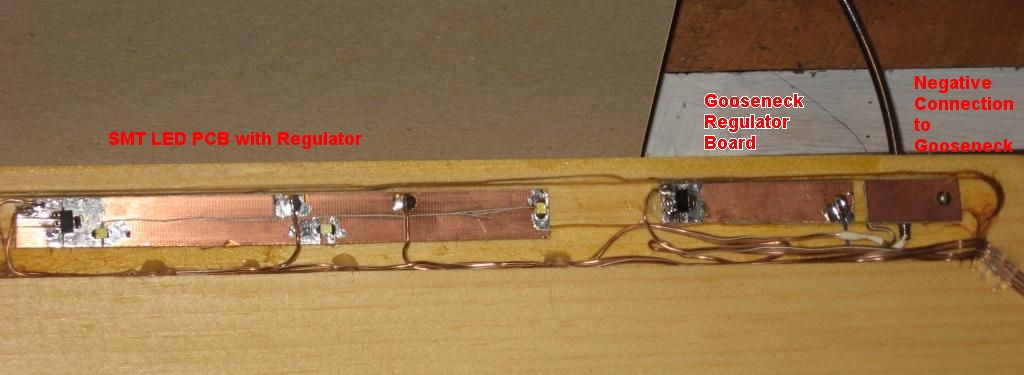
I routed a 3/8" deep slot into the underside of each shelf. To fit into the slots, I made PCBs that were about 1/2" wide by about 6" long. Onto these boards I mounted 3 LEDs, and a constant-current diode. I spaced these PCBs about 12" apart in the slots and hot-glued them in place. I also ran the power wiring in these slots and hot-glued it down too.
The gooseneck spotlight's mounting was quite coincidentally determined by those same slots. I could drill holes into the facing edge of each shelf and the hole would emerge in the slots. All I had to do was add another current-regulator PCB for each spotlight and wire from it to each gooseneck.. The goosenecks receive power through a single wire inside the gooseneck, and use the outer metal as the ground connection. To make that mechanical attachment to the outer metal, the most elegant solution I could devise was simply laying a piece of FR-4 atop the metal and screwing the FR-4 into the wood of the shelf.
PCB Mounting and Wiring
Schematic of the "Lazure" LED console lighting